Djgusa Luxe Manual do Utilizador
Consulte online ou descarregue Manual do Utilizador para Assento para automóveis Djgusa Luxe. Disney Saunter Luxe Travel System/ Sistema de Viaje Disney Manual do Utilizador
- Página / 16
- Índice
- MARCADORES
- TR185, TR201 1
- User Guide / Guía del Usuario 1
- WARNING: 2
- ADVERTENCIA: 3
- Parts / Lista de piezas 4
- Unfold Stroller 5
- Abra la carriola 5
- Front Wheels 5
- Ruedas delanteras 5
- Rear Wheels 6
- Ruedas traseras 6
- Parent Tray 7
- Charola para los 7
- Child Tray 8
- Charola para el niño 8
- ADVERTENCIA 10
- To Use / Para Uso 11
- Replaceable Parts 15
- Piezas de repuesto 15
- Stroller Care and Maintenance 15
- One-Year Limited Warranty 16
- Garantía limitada de un año 16
Resumo do Conteúdo
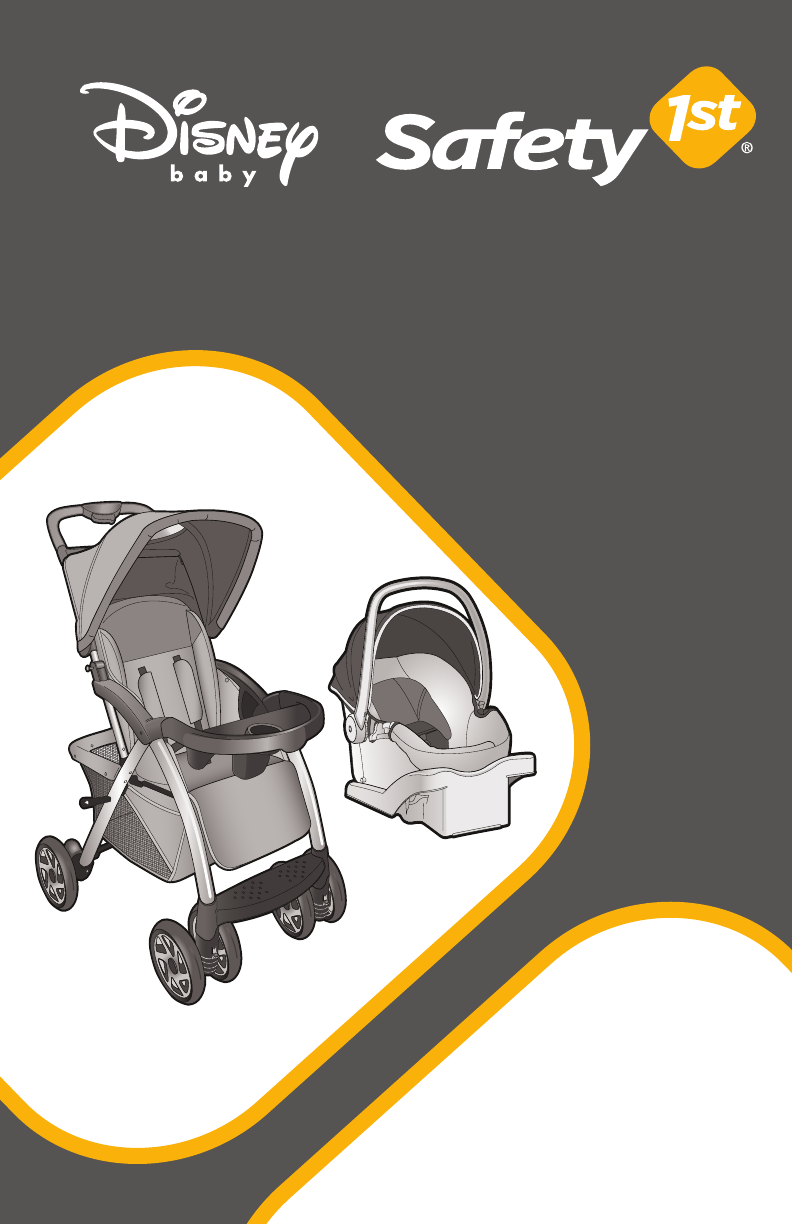
TR185, TR201User Guide / Guía del UsuarioDisney Saunter Luxe Travel System/Sistema de Viaje Disney Saunter LuxeWeight: up to 50 lbs (22.7-kg) Peso: ha
To Use / Para Uso88 WARNING• NEVER LEAVE CHILD UNATTENDED. ALWAYS keep child in view when in stroller. • AVOID SERIOUS INJURY from falling o
To Use / Para Uso9FoldPrior to folding, lock rear brakes and remove your baby. Close canopy. Slide and squeeze the button on handlebar (Figure 9).Push
To Install Infant Car Seat Para instalar los autoasientos de bebé To Use / Para Uso101010To avoid serious injury:• Use ONLY Safety 1st Comfy Carry El
To Use / Para Uso1110When properly installed, car seat will come to rest on child tray and stroller frame (Figure 10c). (continued) Car seat must
To Use / Para Uso121112To Remove Infant Car SeatTo remove the car seat, pull the release lever as shown (Figure 11). Lift car seat.Para quitar el auto
13Replaceable PartsTo order parts call (800) 544-1108. Include the model number and manufacture date (found on the stroller) and a brief description
14One-Year Limited WarrantyDorel Juvenile Group, Inc. warrants to the original purchaser that this product (Disney Saunter Luxe Travel System), is fr
WARNING: For the safety of your child, please read the following warnings and assembly instructions and keep for future reference.• Adult assembl
ADVERTENCIA: Por la seguridad de su hijo, por favor lea las siguientes advertencias e instrucciones de ensamble, y guárdelas para consulta futura.
Parts / Lista de piezas2parent traycharola para los padresKeep These Instructions For Future Use• Hardware for rear wheel assembly is located on axle
Assembly / Armado31Unfold StrollerUnlatch the lock on the side (Figure 1). Slide and squeeze the button on handlebar. Stroller will “click” when compl
Rear Wheels NOTE: Hardware for rear wheel assembly is located on axle. Helpful Hint: For ease of removal and assembly of cotter pin use needle nose pl
Assembly / Armado54Parent Tray Open canopy (Figure 4). Align posts with holes on parent tray. Snap parent tray onto handlebar tubes (Figure 4a). Cha
5Bottom of trayParte inferior de la bandejaTo Use / Para Uso65Child TrayTo assemble: Align tray pin with notch on stroller and slide post into hole (F
To Use / Para Uso767BrakesLock Brakes: Step down onto brake levers on both rear wheels (Figure 6). To park stroller, BOTH BRAKES MUST BE LOCKED. Unloc
Mais documentos para Assento para automóveis Djgusa Luxe


© 2020, manymanuals-pt.com. Todos os direitos reservados. | 0.038 s |
 Manymanuals.com
 Manymanuals.de
 Manymanuals.fr
 Manymanuals.it
 Manymanuals.pl
 Manymanuals.cz
 Manymanuals.es
 Manymanuals-pt.com
Comentários a estes Manuais